Table of Contents
Knowing how to clean a CPAP machine is simpler than you think — and skipping it is what invites mold, bacteria, and that musty morning smell. Here’s the fast version: unplug the machine, remove the mask, tubing, and humidifier chamber, then wash the washable parts with mild, fragrance-free soap and warm water. Rinse thoroughly, air-dry completely, and reassemble only when every part is fully dry.
That’s the routine — but the details matter, because the wrong soap, a skipped step, or the wrong “cleaner” can quietly damage your equipment or irritate your airway. Below, you’ll find a simple daily and weekly schedule, how to prevent mold, what to do if you’ve skipped cleaning for weeks, and the cleaners the FDA warns you to avoid.
CPAP therapy works best when your equipment is clean, dry, and in good condition. A five-minute routine controls facial oils, moisture, dust, mineral scale, and odors—without turning CPAP care into a complicated daily chore.
Important: Always follow the care instructions for your exact CPAP model and accessories. Never put the main machine, power supply, or electronic components in water.
Why clean equipment matters
Your CPAP moves room air through a filter, tubing, and mask into your airway. Those parts meet moisture, skin oils, and airborne particles every night you use therapy. Regular cleaning reduces the buildup that leads to odors, discomfort, blocked airflow, and faster wear on replaceable parts.
A dirty mask cushion can lose its seal because facial oils make the silicone slippery. A neglected water chamber can develop mineral scale, and damp tubing that’s stored poorly can smell musty. Keeping up with care protects both your comfort and the equipment you depend on every night.
Cleaning is also the easiest way to catch damage early. When you handle your mask and hose routinely, you’re more likely to spot small tears, loose connections, cloudy plastic, cracks, or worn cushions before they affect therapy.
Gather these supplies first
You don’t need a cabinet full of specialty products. Set aside a clean basin used only for CPAP equipment, plus a lint-free towel or drying rack.
- Mild, fragrance-free dish soap (or CPAP-safe soap)
- Warm, drinking-quality water
- A clean wash basin
- A soft towel or drying rack
- A soft hose brush designed for CPAP tubing, if needed
- Distilled water for the humidifier chamber
- White vinegar — only if your manufacturer permits it for mineral buildup
Avoid bleach, rubbing alcohol, ammonia, antibacterial soaps, scented detergents, hand sanitizer, strong household disinfectants, essential oils, and abrasive scrubbers. These can leave residue, irritate your airway, or damage silicone, plastic, elastic, and seals.
How to clean a CPAP machine step by step
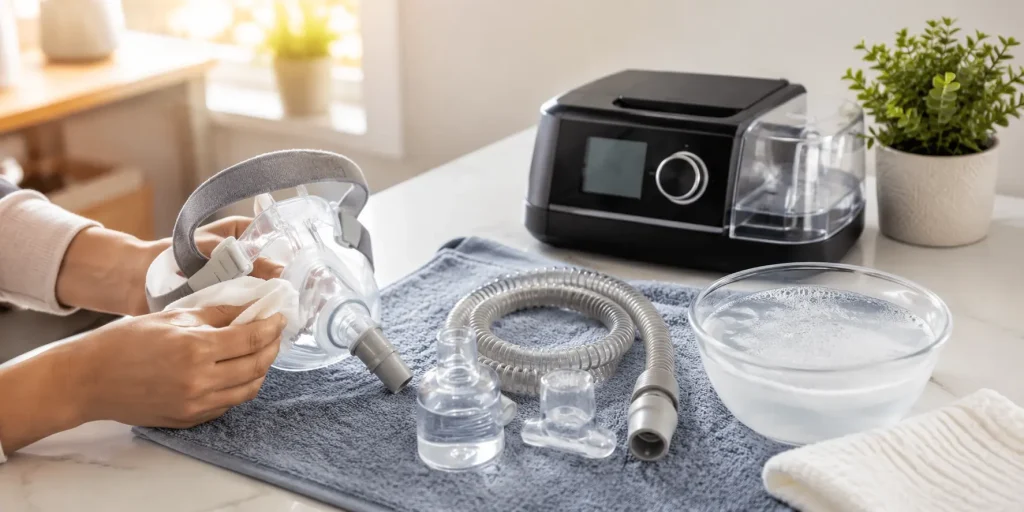
The safest approach is simple: disconnect, wash the removable pieces, rinse well, and let them dry naturally. Do this in the morning so everything has time to dry before bedtime.
1. Turn off and unplug the device
Switch the machine off and remove the power plug before cleaning anything. Set it on a clean, dry surface and disconnect the tubing from the air outlet. Never rinse, soak, or spray the CPAP unit itself. If you use a heated hose, detach it gently and check its manual first — heated tubing contains electrical connections and may have different cleaning requirements.
2. Take apart the removable pieces
Separate the mask cushion, frame, elbow or short tube, headgear, long hose, and humidifier chamber. Keep small parts together so nothing is misplaced. Don’t force components apart; if your mask has clips, magnets, or delicate valves, follow the manufacturer’s assembly diagram. Proper disassembly lets soap and water reach the spots where oils and moisture collect.
3. Empty the water chamber
Pour out any leftover water from the humidifier chamber. Leaving yesterday’s water in place encourages mineral deposits and odors, especially with tap water. Rinse the chamber with warm water and inspect it under good light for cloudiness, white scale, scratches, cracks, or a leaking seal — replace it if it’s damaged rather than patching it.
4. Wash the mask parts
Fill a clean basin with warm — not hot — water and a little gentle soap. Add the silicone cushion, frame, elbow, and any washable connectors. Move each item gently through the solution and use your fingers to loosen skin oil. Pay extra attention to the cushion and vent holes, but never use sharp objects to clear vents, as that can alter airflow or damage the mask.
5. Clean the tubing
Submerge the hose in warm, soapy water and let water travel through its full length, swishing it so the inside washes as well as the outside. A soft CPAP tube brush helps if the hose looks cloudy or smells stale. Rinse until no soap bubbles remain — leftover soap can irritate the nose and throat, so rinsing matters as much as washing.
6. Wash the humidifier chamber
Wash the chamber with warm water and a little mild soap, then rinse well. If your manufacturer allows it and you see mineral scale, soak it in a diluted solution of one part white vinegar to three parts warm water for 15–20 minutes, then rinse thoroughly with clean water.
7. Clean the headgear correctly
Hand-wash the headgear and any cloth straps in warm, soapy water; gently squeeze — don’t wring — and lay it flat or hang to dry. Keep it out of the washing machine and dryer, which can stretch or shrink the elastic and ruin the fit.
8. Rinse everything until no residue remains
Rinse every washed part under clean, running water until there’s no soap film or vinegar smell. Residue is a common hidden cause of airway irritation and musty odors.
9. Air-dry before reassembly
Lay parts on a clean towel or drying rack, and hang the tubing vertically so water drains out. Keep everything out of direct sunlight, which can degrade silicone and plastic over time. Reassemble only when every piece is completely dry.
A realistic CPAP machine cleaning schedule
A routine is easier to follow when it separates quick tasks from deeper cleaning. The goal isn’t perfection — it’s keeping moisture, oils, and dust from building up enough to affect your comfort or therapy.
| Frequency | What to do | Why it helps |
|---|---|---|
| Every morning | Empty the humidifier chamber, rinse it, and leave it open to dry | Limits standing water and mineral residue |
| Daily / every few uses | Wipe or wash the mask cushion | Removes facial oils that cause leaks |
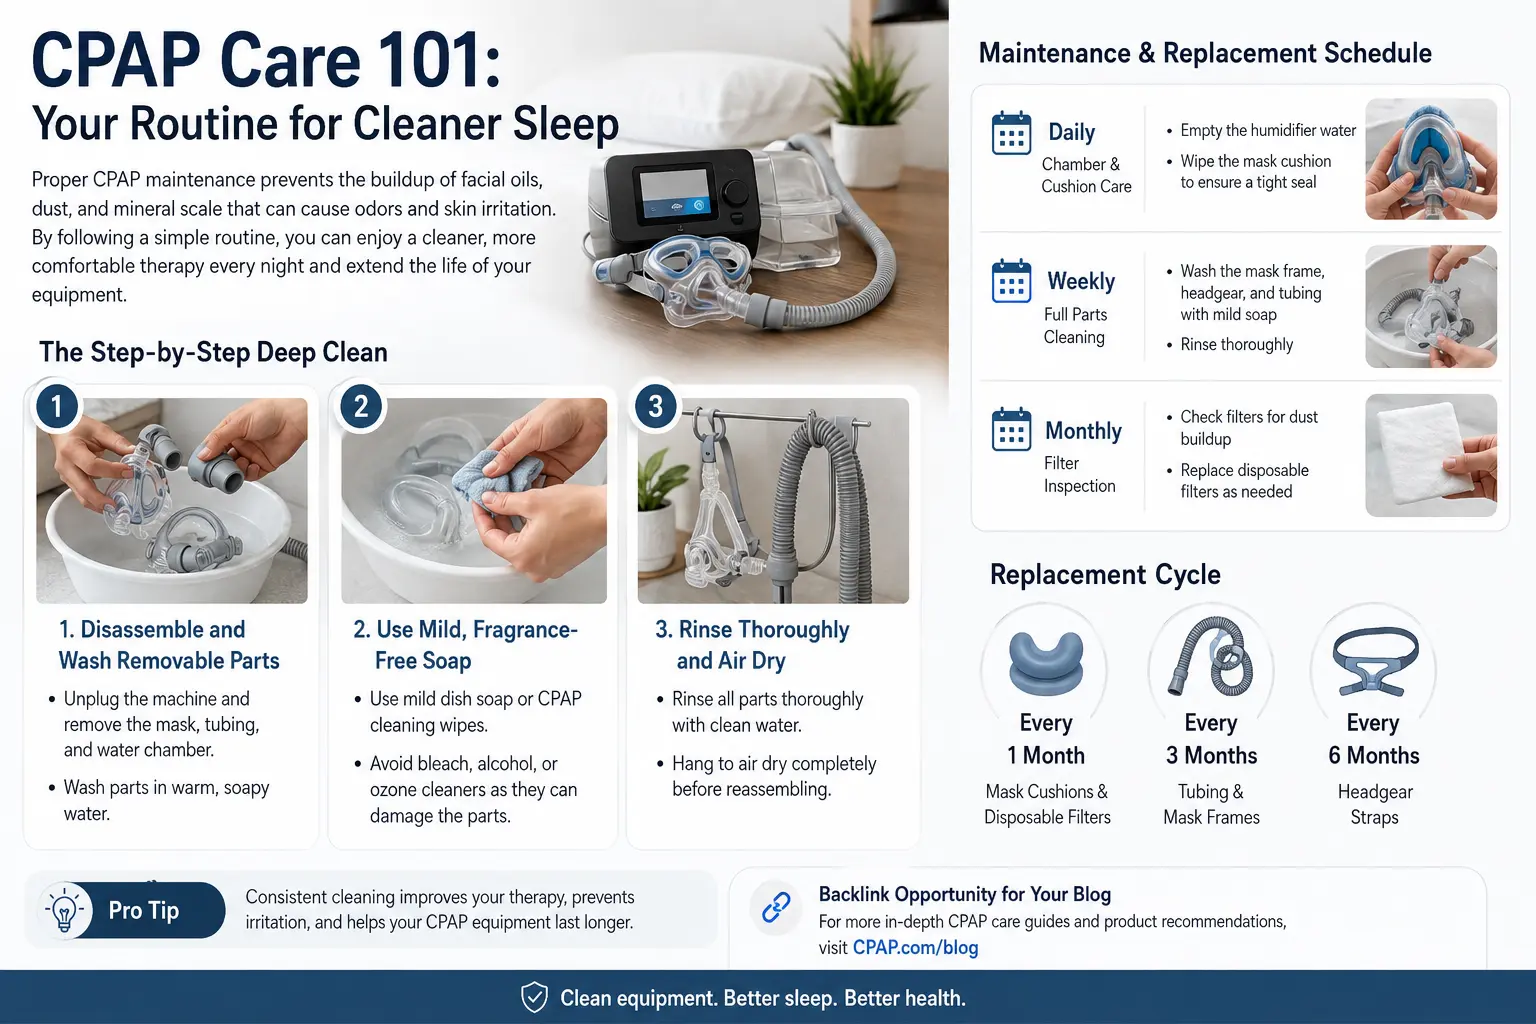
| Weekly | Wash the mask frame, elbow, hose, chamber, and headgear | Clears buildup from the entire air path |
| Monthly | Inspect filters, tubing, chamber, seals, and connections | Catches wear before it becomes a therapy problem |
| As needed | Clean more often if you’re sick, have allergies, notice odors, or live with pets | Reduces exposure to extra moisture and debris |
Replacement timing varies by insurance plan, environment, and product design, but general manufacturer guidance suggests replacing mask cushions and disposable filters about monthly, tubing and mask frames around every three months, and headgear around every six months.
How often to clean CPAP machine parts
The mask cushion needs the most frequent attention because it sits directly on your face — a quick wash or wipe each morning helps it hold a better seal. The hose, frame, chamber, and straps generally need a full wash about once a week; clean them sooner if you’ve been ill, notice an odor, or live in a humid environment.
The main CPAP device doesn’t need washing at all. Unplug it, wipe the exterior with a barely damp cloth, and keep the air intake area free of dust. Check the filter according to your machine’s manual, since filters vary by model — for example, a ResMed AirSense 11 uses a specific disposable filter that shouldn’t be washed and reused.
Haven’t cleaned your CPAP in a while? Here’s how to recover
If you’ve skipped cleaning for weeks, don’t panic — and don’t throw the equipment out. In most cases a thorough deep clean brings it back to safe, comfortable use. Here’s how to reset:
- Inspect first. Look inside the tubing, mask, and humidifier chamber under good light. Cloudy film, a musty smell, or sticky residue means overdue cleaning — but it’s usually washable.
- Do a full deep clean. Follow the step-by-step wash above, then soak the chamber and tubing in the diluted white-vinegar solution (if your manufacturer allows) to lift mineral scale and odor.
- Check for mold. If you see black, green, or pink spots, slime, or discoloration that won’t wash off, stop using that part and replace it. Mold cannot be safely “cleaned away” with bleach or perfume — replacement is the only safe fix.
- Replace worn consumables. If cushions, filters, or tubing are past their replacement window, swap them now rather than deep-cleaning old parts.
- Reset your routine. Restart with the daily and weekly schedule above so you don’t fall behind again.
A single lapse rarely makes a machine dangerous — but breathing through mold or heavy residue can irritate your airway, so when in doubt about a part, replace it.
CPAP cleaner vs soap and water
For most users, mild soap and warm water remain the most straightforward, broadly recommended way to wash removable CPAP components. It’s inexpensive, easy to control, and doesn’t expose your equipment to ozone, harsh chemicals, or unapproved agents.
Automatic cleaning devices may seem convenient, but convenience isn’t the same as suitability. Some use ozone gas or ultraviolet (UV) light, may not remove visible oils or residue, and can conflict with your warranty. The U.S. Food and Drug Administration (FDA) has cautioned that ozone and UV-light CPAP “cleaners” can cause respiratory irritation and may damage equipment, and that these devices haven’t been shown to be safe and effective for home CPAP cleaning. Manufacturer directions should always take priority over marketing claims.
A practical approach: use soap and water as your routine method, and reserve any extra cleaning tool only for the components your manufacturer specifically approves. If you’re unsure whether a product is compatible with your mask, hose, or chamber, don’t use it until you verify it.
CPAP mold prevention: keep moisture from lingering
The best defense against mold and mildew is complete drying. Water sitting in a closed humidifier chamber or trapped inside a hose creates the damp conditions that cause musty smells and visible growth.
Use fresh distilled water in the chamber each night when your manufacturer recommends it. In the morning, discard leftover water instead of topping it up, and leave the chamber open with the hose positioned so air moves through it. If you see discoloration, slime, or spots that don’t come off with approved cleaning, stop using that component and replace it — never try to “fix” mold with bleach or strong disinfectants.
Keep the machine working well
Check the filter regularly. Your CPAP filter protects the motor by trapping dust and airborne particles; a blocked filter makes the machine work harder. Replace disposable filters on your manual’s schedule, and check them more often if you have pets, smoke indoors, or live in a dusty area. Rinse reusable filters only if the manufacturer says they’re washable, and let them dry fully before reinstalling.
Protect the water chamber. Distilled water reduces mineral buildup; tap water can leave white deposits that cloud the chamber and shorten its life. Replace the chamber if it’s cracked, warped, or no longer seals.
Listen for changes. A new rattle, whistle, or grinding noise is worth investigating — check the filter, tubing, chamber, and mask connection first. If the noise continues after cleaning and reconnecting, contact your provider; don’t open the housing yourself.
Watch your therapy data. Cleaning can’t fix a prescription issue, but it makes problems easier to spot. If your leak rate rises or AHI changes unexpectedly, inspect the mask, cushion, tubing, filter, and chamber before assuming the machine is failing.
Maintenance habits that prevent overspending
Good CPAP maintenance is less about buying more products and more about noticing small issues before they get expensive. A five-minute weekly inspection can stop a worn cushion or clogged filter from being mistaken for a failing machine. Before replacing your device, work through this checklist:
- Wash and fully dry the removable components.
- Install a clean, compatible filter.
- Check tubing for pinholes, stiffness, cloudiness, or loose ends.
- Examine the mask cushion for flattening, tears, or loss of grip.
- Inspect the chamber for cracks, scale, and leaking seals.
- Review therapy data and note when symptoms changed.
- Contact your provider if the unit still sounds abnormal or performs inconsistently.
If your machine is simply aging out rather than dirty, see our guide on how long CPAP machines last to judge whether it’s time to replace it.
When cleaning is not enough
Cleaning protects your equipment, but it can’t restore a worn motor, damaged board, failed sensor, or outdated pressure system. If your machine gives repeated errors, stops during the night, produces a burning smell, or can’t maintain therapy, stop using it and seek support. Never use a machine with water or electrical damage. For urgent concerns — chest pain, severe shortness of breath, or a major return of sleep-apnea symptoms — contact a healthcare professional promptly.
If you’re shopping for a replacement, our CPAP machine buying guide walks through types, features, and costs.
FAQ's
How often should I clean my CPAP machine?
Rinse the humidifier chamber and wipe the mask cushion daily, and give the mask, tubing, chamber, and headgear a full wash weekly. Inspect filters and seals monthly. Clean more often if you’re sick, have allergies, use a heated humidifier daily, or live in a humid or dusty home.
Can I use dish soap to wash CPAP equipment?
Yes — a mild, fragrance-free dish soap that rinses cleanly is fine. Avoid antibacterial, moisturizing, strongly scented, or harsh degreasing formulas, which can leave residue and damage silicone or plastic. CPAP-specific soap is optional unless your manufacturer recommends it.
Should I use vinegar to clean my CPAP humidifier chamber?
Diluted white vinegar (about one part vinegar to three parts water) can lift mineral scale from a compatible chamber when the manufacturer allows it. Soak briefly, then rinse repeatedly with clean water. Don’t use vinegar as a substitute for regular washing, and never mix it with bleach.
Are ozone or UV CPAP cleaners safe to use?
The FDA has cautioned that ozone and UV-light CPAP cleaners can cause respiratory irritation and may damage equipment, and they haven’t been shown to be safe and effective for home use. Soap and warm water remain the recommended method for most people.
Why does my CPAP hose smell musty?
A musty hose usually means moisture stayed inside too long or residue built up. Wash it with mild soap and warm water, rinse well, and hang it with both ends open until fully dry. Replace the hose if the odor, discoloration, or buildup won’t clear.
Do I need to clean the CPAP machine itself?
No — the base unit holds electrical parts and should never be washed. Unplug it, wipe the outside with a lightly damp cloth, and keep the air intake free of dust. Wash only the removable mask, hose, humidifier chamber, and
Can I put CPAP parts in the dishwasher?
Only some water chambers are dishwasher-safe, and only when the manufacturer specifically approves it. Masks, cushions, tubing, and headgear should be hand-washed, because dishwasher heat and detergents can damage silicone, plastic, and elastic.
Can poor cleaning affect my CPAP pressure?
Yes, indirectly. A clogged filter can restrict airflow and an oily, worn cushion can cause leaks, so therapy may feel weaker. Cleaning won’t change your prescribed pressure, but it helps the system deliver therapy as intended. Persistent weak airflow or changing symptoms should be reviewed by your provider.
The bottom line
Knowing how to clean a CPAP machine comes down to a simple rhythm: rinse the chamber and cushion daily, wash the full air path weekly, inspect monthly, and dry everything completely before reassembly. Use mild soap and water — not ozone, UV, or harsh chemicals — and replace parts that are worn or won’t come clean. Keep that routine and your therapy stays comfortable, effective, and reliable night after night.
Shop related products
A consistent care routine is easier when you have clean, compatible replacement supplies on hand before an old part fails. cpapRX offers machines, masks, tubing, filters, humidifier chambers, and therapy accessories for common sleep-apnea setups.
- Browse CPAP machines if your device is no longer reliable or your clinician recommends an update.
- Explore cpapRX services for help with a prescription, home sleep study, or monitoring support.
Check your device manual and confirm your model number before ordering — a part that fits correctly is easier to maintain and more comfortable to use.
Resources & Further Reading
- Cleveland Clinic — How to Clean a CPAP Machine
- ResMed — When to Replace CPAP Supplies
- Sleep Health Foundation — Caring for Your CPAP Equipment
Medical Disclaimer: This guide is for general education only and is not medical advice. Always follow the cleaning and safety instructions for your specific CPAP device, and consult a qualified healthcare provider about your therapy or equipment. In an emergency, call 911.